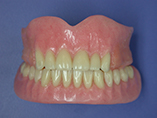
"Three Appointment" Denture® Procedure
First Appointment

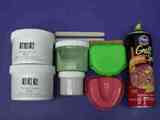
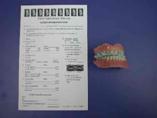
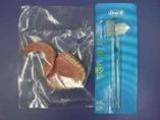
These are the materials you will need for the first appointment. The Accu-Gel System 1 is recommended.

Take two papillameter readings, relaxed and high smile.
Take an alameter reading.
Take upper impression
Please pour within twenty minutes.

Take lower impression.
Please pour within twenty minutes.

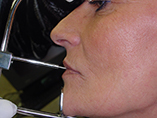
Take profile scale reading or other instrument to help establish a vertical.
A very close vertical at this appointment will help to reduce extra appointment later.
Take bite at estimated vertical position, mark midline.
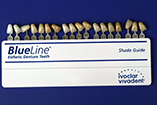
Take shade.
Send upper and lower models, bite, prescription and patient information form to lab.
Second Appointment
You will receive upper and lower wax try-in.
Check the vertical with a profile scale, or other means available.

Check mid line, shade and set up. Make notes on prescription of changes to be made.
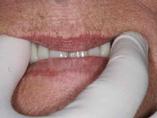
Check patient’s speech by saying Mississippi and/or 77. This will help to determine if vertical and freeway space are correct.
Take bite with any C&B material and send back to lab with prescription to make changes and/or to finish.
Third Appointment
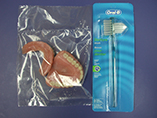
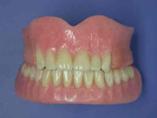
Third appointment is finished dentures with a complimentary denture brush.
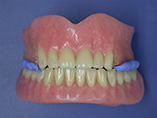
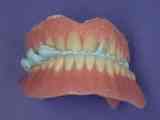
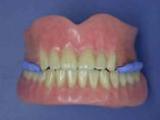
Upper & lower milled in occlusion, (Estep occlusion).

Another Happy Patient!
"Three Appointment" Duplicate Denture Procedure
First Appointment
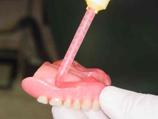
Place tissue treatment material in dentures. This will stabilize the denture.
Take bite.
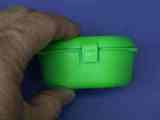
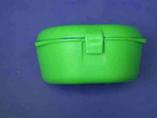
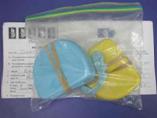
Materials that are in the “Three Appointment” Duplicate Denture system kit.
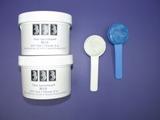
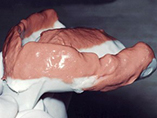
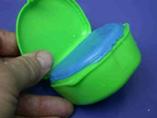
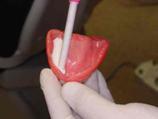
Mix 1 scoop of White and 1 scoop of Blue putte and knead together for 15 seconds.
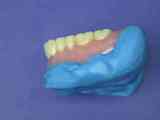
Roll putte into rope shape and press into tissue side of denture.
Press denture into short/top side of tray.
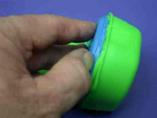
Close tray, this will help with clean up of excess materials.
Make sure that excess material is cleaned around all edges of tray.
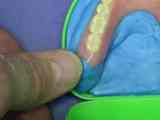
Fill in all void areas.
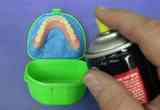
Spray with release agent.

Spread release agent evenly over denture and base.
Snap lid closed.

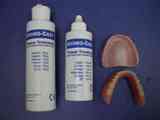
Materials you will need to finish duplication of denture
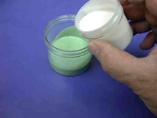
Pour entire contents of small container into large container.
Thoroughly mix contents for 15 seconds.

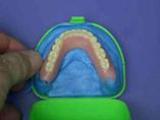
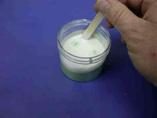
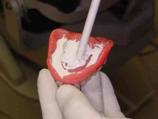
Pour contents slowly into base of tray.
Let material set for 5 minutes minimum.
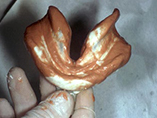
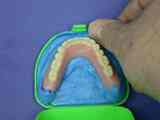
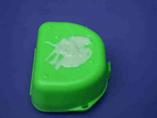
Open lid slowly.
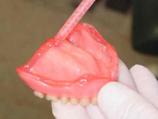
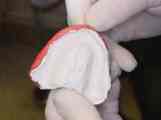
Remove blue base from tray and check for voids.
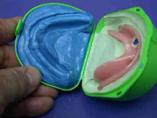
After checking for voids remove denture from tray.

Any voids in impression should be repaired with poly vinyl.
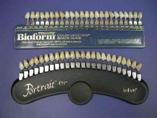
Take shade of old denture.
Review duplicate denture worksheet for all changes to new denture.
Send Rx, worksheet, bite and trays to lab for second appointment.
Second Appointment
You will receive upper and lower wax try-in for your second appointment.
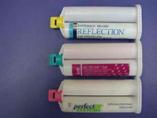
These are the materials you will need to complete the second appointment.
Use the GC Reline Soft to border mold the denture.
Place material across the post dam area.
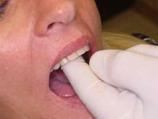
Place denture in patient’s mouth, use firm pressure in the palate, and hold for 15 seconds.
Guide patient into closed bite position, hold for 4 minutes.
Place any light body C & B material in patient’s denture.
Place small amount of material across palate.
Place denture in patient’s mouth, use firm pressure in the palate, and hold for 15 seconds.
Guide patient into closed bite position, hold for 4 minutes.
C & B material will fill in all void areas.
Take bite with any C&B bite material and send back to lab with prescription to make changes and/or to finish.
Third Appointment
Third appointment is finished dentures with a complimentary denture brush.
Upper & lower milled in occlusion, (Estep occlusion).

Another Happy Patient!
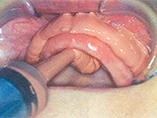
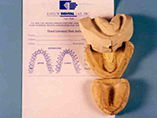
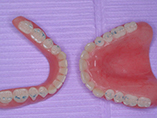
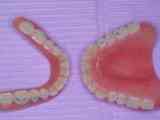
Neutral Zone (Edentulous) Dentures
Note the black lines starting at the cuspid areas and extending distally following the crest of the lower ridge. Dentistry has taught that the buccal cusp be placed over the crest of the lower ridge when positioning the posterior teeth
For most patients this is OK, but for some it may position the lingual cusp so far lingually that it creates undercuts the tongue can get under.
The posterior teeth on this setup need to be moved bucally to remove the undercut created by the teeth position.
Note the first and second molars set on this baseplate. The 4 molar teeth’s buccal cusps are over the crest of the ridge, the lingual cusps of the molar teeth have created undercuts large enough for the tongue to unseat the lower denture during talking, swallowing and when the patient is chewing food.
Note on the these teeth the lingual cusps are in line with the crest of the ridge. There are no lingual undercuts. The tongue would not be restricted on this case by any of the posterior teeth.
When it’s necessary to position the lingual cusp of the lower teeth over the crest of the ridge. To eliminate the undercut we must be concerned about cheek biting when setting the upper teeth.
Setting the upper teeth in a cross bite position, when it is necessary, will solve cheek biting problems. Cross bite set ups rarely cause problems for the patient.
A. The mandibular neutral zone is an area where the lower teeth can be positioned between the tongue and cheek without infringing on the tongue.
B. The maxillary neutral zone is an area where the upper teeth are positioned to occlude with the lower teeth between the tongue and cheek without infringing on the cheek.
C. Setting teeth in the neutral zone position will assist the denture patient to be more comfortable wearing dentures.
I contend when we position lower teeth that don't capture the patient’s tongue, and then position the upper teeth in occlusal contact with the lower that won’t cause cheek biting. We have set the teeth in a neutral zone position for the patient.
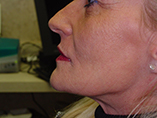
Alameters
The Alameter is used to establish the width and the appropriate mold selection of the upper six anterior teeth.
It consists of:
-
Caliper (for measuring the ala-to-ala distance)
-
Number Scale
-
Mold Indicating Arrows
-
Conversion Scales - suggest masculine and feminine (large, medium, small) tooth molds
Instructions For Use
-
Measure with the tips of the Alameter's Caliper, the widest part of the patient's nose alae-to-ala. This measurement of the nose determines the width of the anterior arch as it was before the teeth were extracted - providing a center-of-cuspid to center-of-cuspid measurement.
-
Put the measurement indicated on the Measuring Scale on the work authorization for your dental technician.
Dento Profile Scales
GENERAL TECHNIQUES
The Dento-Profile Scale is a precision instrument used to secure quick, accurate measurements in determining the ideal vertical bite position. The advanced design of the Scale provides simple easy-to-adjust movements without inconvenience to the patient.
Repeatable measurements can be secured when the Scale is positioned in proper contact with the nasion and the symphysis. The tissue is light over these points and with a little pressure, contact with the bone can be felt and the same position obtained each time. These bony landmarks should be palpated prior to measurement.
Pre-extraction measurements are charted of all facial dimensions that are lost with the extraction of the teeth. At this time, any changes needed should be calculated and recorded.
In edentulous cases without records, the bite is set to a definite computed distance obtained with the scale.
In remaking old dentures, actual distances are charted and reproduced or altered to reflect more nearly normal dimensions.
All denture patients should be charted and checked at periodic intervals for resorption and changed facial dimensions.
This record will eliminate guesswork in denture restoration. Without positive measurements, the average denture is usually the result of combined guesswork of all concerned. The record chart will settle most questions as to previous appearance.
The Dento-Profile Scale is also recommended to obtain measurements in implantology, fixed and removeable prosthodontics, and orthodontics.
Vertical Relation
With the Dento-Profile Scale any position of the mandible can be accurately measured and recorded. In order to establish the proper bite opening, it is necessary to know the exact position of the mandible from which the maximum in esthetics can be obtained. It is also necessary to know the precise point where the physiological rest bite is found. This bite determines the position of the mandible from which the greatest biting power and efficient denture function can be obtained.
The ideal vertical bite relationship will restore the maximum in esthetics while not infringing on the freeway space.
In most normal faces, the esthetic bite and the anatomical bite are found to be very closely related. In other faces, some variation may be present. It may be necessary to establish the vertical bite at an alternate point to restore the greatest amount of esthetics, to insure adequate denture function and maintain a freeway space.
Esthetics is dependent upon facial balance and is present when the length of the chin equals the length of the nose. With the Dento-Profile Scale, the length of the nose (A to B) added to the distance found at the lip line (A to C) will give the amount for the full length of the face in the esthetic bite.
The rest position of the mandible exists when the elevator and depressor muscles are neutral. This remains constant and does not change with the gradual change of the bite. Rest position can be voluntary or involuntary. The exact position of the mandible can be measured and recorded with the Dento-Profile Scale. The functional bite is usually 2 to 3 mm less than the rest position. This amount of space is needed for cusp and overbite clearance and muscle rest. Using this method, the correct vertical dimension can always be established without guesswork.
Lost Facial Dimensions
Since loss in vertical dimension is a gradual process, patients are often not aware of their changed expressions until considerable damage to the denture-bearing tissues has already occurred.
The principal cause of rapid and excessive resorption of the dental ridges is wearing dentures with a closed bite. The closed bite destroys the articulation of the teeth, causing loss in stability, and, with unequal pressure on the ridges, greatly increases resorption. Other inevitable results of the closed bites are loss of biting power, and protrusion of the jaw.
With new dentures a certain amount of settling must be expected. This loss can be restored by having the dentures reltned. With periodic rechecks it is possible to maintain the bite opening at the correct vertical dimension.
With the Dento-Profile Scale the dentist can establish facial harmony and balance in the bite from accurate measurements and can demonstrate the exact amount of loss in dimension at any time. Maintaining the correct vertical dimension is of great importance to the denture patient.
OBTAINING BASIC MEASUREMENTS
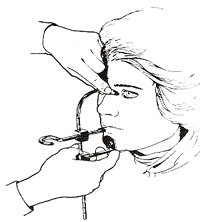
Patient must be in upright position.
-
Place Nose Seat (1) firmly on the bridge of patient's nose, the nasion.
-
Raise Chin Seat (5) up to bottom of chin.
-
Move Horizontal Gauge (11) into position to measure under patient's nose. Record reading from Vertical Scale (7) at top of Slide Block (2).
-
Move Horizontal Gauge (11) down Scale to patient's lips. Measure just under patient's upper lip. Record reading from Vertical Scale (7) at top of Slide Block (2).
-
Add the two recorded numbers and set the Chin Seat (5) on the total calculated reading. This will give an excellent starting point for the patient's vertical position.
FORMULA: NOSE (reading in B) + LIP (reading in C) = CHIN (reading in E)
NOTE: Two fingers of one hand should always be kept on the Nose Seat to position it in the nasion. Use direct inward pressure. The Chin Seat and Horizonital Gauge should be manipulated with the right hand. The full length of the face is taken with pressure to the bone, one finger extended under the Chin Seat. When using Scale for horizontal records, have Chin Seat positioned slightly loose under chin.
Some cases may appear incorrect; however, by checking the patient's profile and the corner of the patient's mouth and lips, you will be reassured of the Scale's accuracy.
Should the measurements still seem to be incorrect, remeasure. There are some instances in which you must close or open the bite slightly more than indicated.
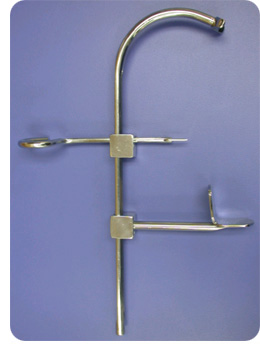
DENTO-PROFILE SCALE - PRECISION MODEL
-
NOSE SEAT
-
TOP OF SLIDE BLOCK (OBTAIN UPPER VERTICAL READINGS HERE)
-
HORIZONTAL READING POINT
-
POINT OF HORIZONTAL GAUGE
-
CHIN SEAT
-
STEM
-
VERTICAL SCALE
-
HORIZONTAL SCALE
-
TENSION SCREWS (NOT SHOWN)
-
TOP OF SLIDE BLOCK (OBTAIN LOWER VERTICAL READINGS HERE)
-
HORIZONTAL GAUGE INSTRUCTIONS FOR USE
The measurements indicated on the Dento-Profile Scale are calibrated in millimeters. Thus the first figure on the Stem (6), no. 3, represents 30 mm or 3 cm. The 0 represents 100 mm, and the 10 equals 110 mm. The graduated lines between the numbers equal 1 mm each. Vertical measurements are taken with the Point of the Horizontal Gauge (4) and the Chin Seat (5). Readings are obtained from the top of the Slide Block (2) & (10). Horizontal measurements are taken with Point of the Horizontal Gauge (4) and read at (3).
This Dento-Profile Scale is made of all stainless steel parts.
RECORD CHART
Click here to download a printable record chart.
NOTE: Individual charts may be photocopied for each patient, or you may wish to order charts directly from the Dento-Profile Company.
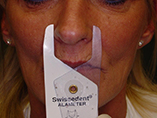
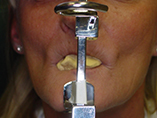
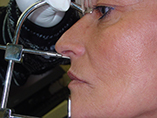
Papillameters
The Papillameter is an important measuring device used by the dentist to gain more accurate, personalized esthetic results in denture and denture-related implant cases. The Papillameter takes the measurement of the length of your patient's upper lip. This enables the dental technician to establish the anterior length of the upper ant teeth, simply, accurately and individually for each patient.
It consists of:
-
Vestibule Shield
-
Incisive Papilla Rest
-
Vertical handle for measuring lip length
Instructions For Use
-
Have the patient standing or sitting upright for this procedure.
-
Holding the Papillameter perpendicular to the floor, place the Incisive Papilla Rest on the incisive papilla. Make sure the lip is at it's full rest position and not pushed or pulled upwards or outwards by the Papillameter.
-
Read the measurement with eyes on a level with the low lip line.
-
Now specify the Papillameter reading on the Laboratory Authorization Form.